How to See Outermost Pages in a 6-page Display

This video is about being able to see the outermost pages in a 6-page display. Here are two options:

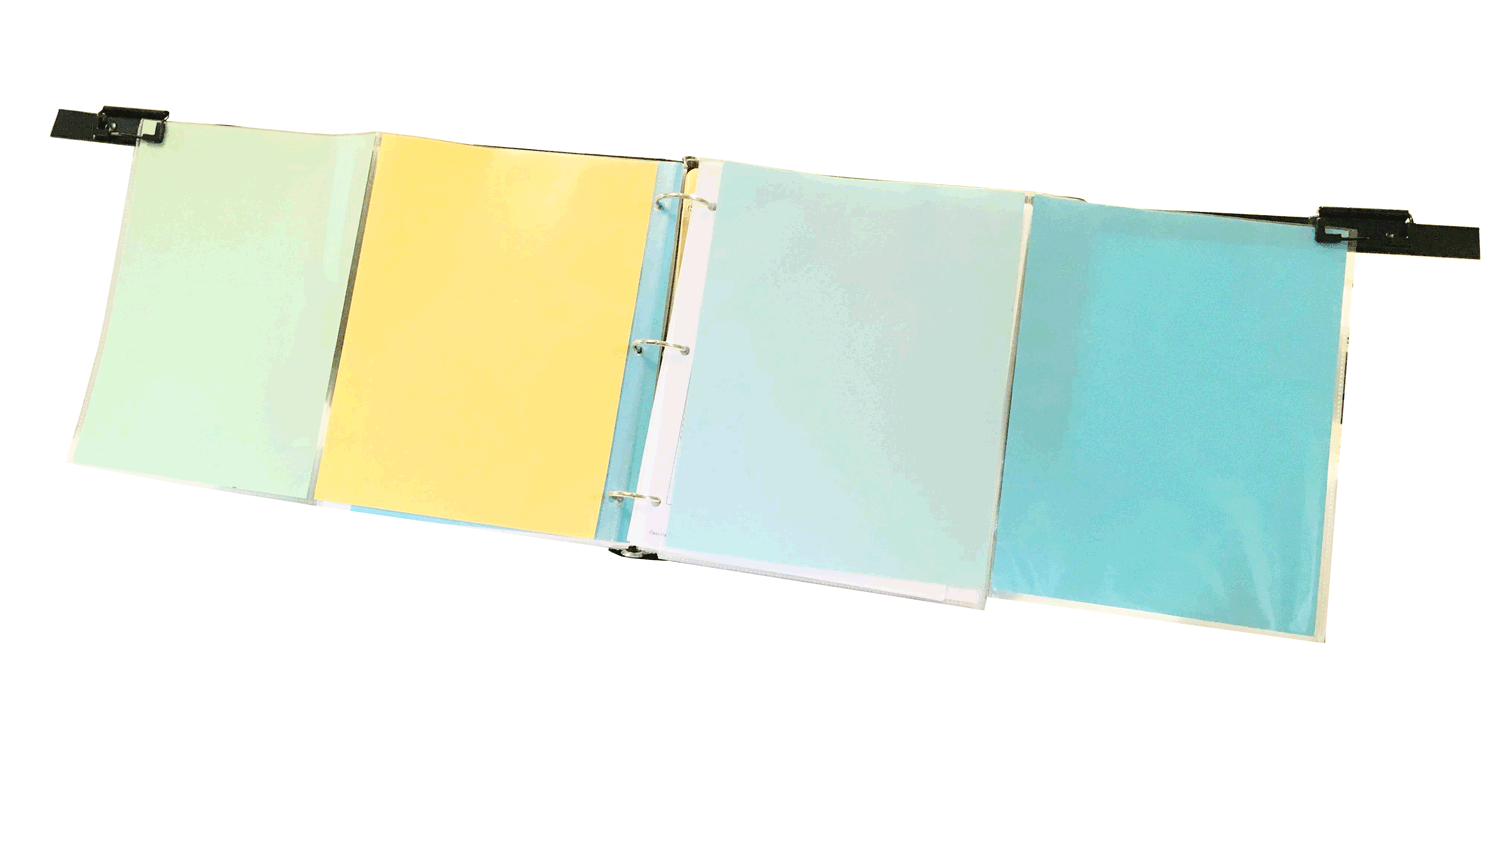
  1. Slide the binder back and forth using the rings to bring those outermost pages into view.  You can do that confidently knowing your material won’t fall off. It's safely contained in the sheet protectors, and the clips on the swing-out arms will hold it up. It’s easy to slide back and forth to bring those pages into better viewing range.

  2. If sliding the binder isn't an option (it’s on a music stand or you have endcaps on your music rack), consider displaying only 4 pages of music. Use the trifold sheet protectors with just the inner and middle pockets filled (outer pockets will be empty) or use bifold sheet protectors. In this case, you’re still saving some page turns and your music is safely contained and held by the swing-out arm clips.

Landscape Documents in a ChoreoKeeper

To use a ChoreoKeeper with music/documents printed in landscape mode, you’ll need fold-out sheet protectors with no seam between the two pockets. (We don’t carry these, but Staples does; scroll down to get the link.)

These hold papers up to 11” x 17” in landscape mode. ChoreoKeeper clips keep the fold-out sheet protectors from sagging.

This will work even if the paper isn’t a full 11” x 17”. It’s a good solution if your music or document is an odd shape.

The white page on the right is 8-1/2" tall x 17" wide. Because it's in a fold-out sheet protector, it still works in the ChoreoKeeper. The arm clip keeps it from sagging.

Staples carries the fold-out protectors with no seams.

Write on Pages in Sheet Protectors

This short video gives two suggestions for writing on pages when they’re in sheet protectors:

  1. Take the page out to write on it, then put it back in its sheet protector pocket

  2. Write your note on a post-it, then put that on top of the sheet protector

If for some reason, these aren’t doable, there’s one more option not mentioned in the video.

Although trifold and bifold sheet protectors make for easier music change-outs, the ChoreoKeeper binder can be used without them. (You’d need to tape 2-3 pages together to take advantage of the clips.) Using the binder without sheet protectors means that your music pages are always exposed.

Write on pages in sheet protectors.jpg

Will This Work with A4-Sized Paper?

Yes, this will work with A4-sized paper. If you’re using a ChoreoKeeper binder, your paper’s length needs to be shortened—either by trimming or folding—to completely fit in the trifold or bifold sheet protectors. Keep reading…

[Note: If you’re NOT using trifolds or bifolds with a ChoreoKeeper binder, it’s up to you as to whether you want the extra paper length sticking out of the sheet protectors.]

This system is designed for US Letter size pages. However, many countries—outside of North America and parts of Central and South America—use A4 size paper.

A4 pages are taller and narrower than US Letter.

Thus far, happy ChoreoKeeper users in Australia, Ireland, and the UK have modified the length of their A4 pages to fit.

If you’re considering this, we don’t want you to be surprised. For A4 paper to fit, the length needs to be shortened by just under 3/4 in (17.6mm); no adjustment is needed on the width. Here’s the comparison in sizes:

  • US Letter: 8.5in x 11.0in (215.9mm x 279.4mm)

  • A4 size: 8.3in x 11.7in (210.0mm x 297.0mm)

See picture below for a comparison.

Arrange a Large Setlist Using Both Bifolds and Trifolds

When you have a large setlist, it’s nice to know that your music is in order and ready to go, with page turns minimized! Here’s how to arrange your large setlist using both bifold and trifold sheet protectors.

For comparison, this example uses the same setlist used in Arrange a Large Setlist Using Only Trifolds. It has 14 songs, 3-10 pages long (most are 4-5 pages). There are 62 total pages of music.

This focuses on how to arrange the setlist using both bifolds and trifolds.

There are pros and cons to using the combination of bifolds and trifolds.

It may be less cost-effective. It won’t be a significant difference, but you’ll need both bifold and trifold sheet protectors to make this work.

Music will be in right-sized sheet protectors. Using both bifolds and trifolds means that you can use the sheet protector combination that exactly fits the number of pages in each song.

There’s slightly more bulk. No two pieces of music share a trifold or bifold; therefore, more sheet protectors are used.

Using both is great for a frequently changing setlist. Each piece of music is contained in its own bifold/trifold combo (no songs “share” a sheet protector). That makes it super easy to move songs around if the order changes.

You can set it and forget it. If you like storing music in sheet protectors, you’ll never have to change music in and out of them. You merely grab the sheet-protected songs you need, and load them into the binder in the order of your playlist.

The video below describes how to arrange the setlist using bifolds and trifolds. Songs are placed in the binder in the order in which they’ll be played.

A close-up of the infographic used in the video is shown below that.

Using bifolds and trifolds to arrange this large setlist took 17 bifolds and 8 trifolds. That equates to

  • 1 ChoreoKeeper binder (with its included set of 4 trifolds),

  • 1 additional set of trifolds (4 trifolds/set), and

  • 3 sets of bifolds (6 bifolds/set).

This compares to the trifold-only option which used

  • 1 ChoreoKeeper binder (with its included set of 4 trifolds) and

  • 3 additional sets of trifolds (4 trifolds/set).

Arrange a Large Setlist Using Both Bifolds and Trifolds

Large Setlist Arrangement Using Both Bifolds and Trifolds (click to open in a new window)

Large Setlist Arrangement Using Both Bifolds and Trifolds (click to open in a new window)

Arrange a Large Setlist Using Only Trifolds

When you have a large setlist, it’s nice to know that your music is in order and ready to go, with page turns minimized! Here’s how to do that using trifold sheet protectors.

This example uses an actual setlist with 14 songs, 3-10 pages long (most are 4-5 pages). There are 62 total pages of music.

There are two main options for arranging a large setlist in a ChoreoKeeper:

  1. Use only trifold sheet protectors

  2. Use a combination of bifold and trifold sheet protectors

This focuses on how to arrange the setlist using only trifolds. To see the other option, go to Arrange a Large Setlist Using Bifolds and Trifolds.

There are pros and cons to using only trifolds.

It may be more cost-effective. Because this option uses only trifold sheet protectors, you don’t need to also have bifolds. With their three pockets, trifolds are the most versatile. It’s always okay to leave an outer pocket empty (just fold it in or leave it extended).

Outer pockets may be empty. This can be bothersome if you’re the kind of person who likes to have everything right-sized. 🙂

There’s slightly less bulk. Different pieces share the sheet protectors; therefore, fewer overall sheet protectors are used. One song will be loaded into the front side of the sheet protector pockets; another song will be loaded into the same pockets but showing on the back side. Watch the video if this sounds confusing.

It’s good for a setlist which doesn’t change often. If you’re planning for a seasonal large event, or onetime concert, you can load the sheet protectors and not be concerned with having to rethink your loading order for a while.

It’s not good for a frequently changing setlist. If you have gigs with often-changing song orders, changing out the music and moving it around can get old…quickly.

The video below describes how to arrange the setlist using only trifolds. Songs are placed in the binder in the order in which they’ll be played.

A close-up of the infographic used in the video is shown below that.

To recap, arrangement of this large setlist used single pages and 13 trifolds. That equates to
  • 1 ChoreoKeeper binder (with its included set of 4 trifolds) and

  • 3 additional sets of trifolds (4 trifolds/set).

Arrange a Large Setlist Using Only Trifolds

Large Setlist Arrangement Using Trifolds (click to open in a new window)

Large Setlist Arrangement Using Trifolds (click to open in a new window)

Use with Music Longer than Six Pages

A question that pops up from time to time is what to do with music that's longer than six pages. No, it's not time to go back to cardboard and tape! 

Depending on how much longer the piece is, there will need to be some page turns, but not as many as there would be without a ChoreoKeeper.

Watch the video or see the steps shown below the video for how to set up a piece of music up to 10 pages long. 

With music 10 pages long,

  1. Set up pages 1-3 in the trifold on your left.

  2. Put pages 4 and 5 (back to back) in a single sheet protector.

  3. Put pages 6 and 7 (back to back) in a single sheet protector.

  4. Set up pages 8-10 in the trifold on your right.

You'll play pages 1-4, turn the first single sheet protector once to reveal pages 5 and 6, turn the second single sheet protector to reveal pages 7-10. 

If you have only 9 pages, the right outermost pocket can be left empty or folded back.

For an 8-page song, you'll need only one single sheet protector in the middle of the left and right trifolds. 

To bring outer pages into better viewing range, slide the binder back and forth by grasping the rings.

This approach can be applied to songs with even more pages. However, if you have too many more, it could be time to consider something different, like a person to help with page turns or an iPad Pro. 


Hole Reinforcing Strips

Over time, your sheet protector holes may begin to stretch and tear. This is especially true of trifolds which need more careful handling than single-page sheet protectors.

Because trifolds can be extended so far out and can hold three times the material (thus making them heavier), their holes are subject to higher stress.

The hole tearing can be delayed by making sure to "accordion in" trifolds before turning. Also it's a good idea to leave a little slack when clipping the trifolds (so that they're not pulling against binder rings).

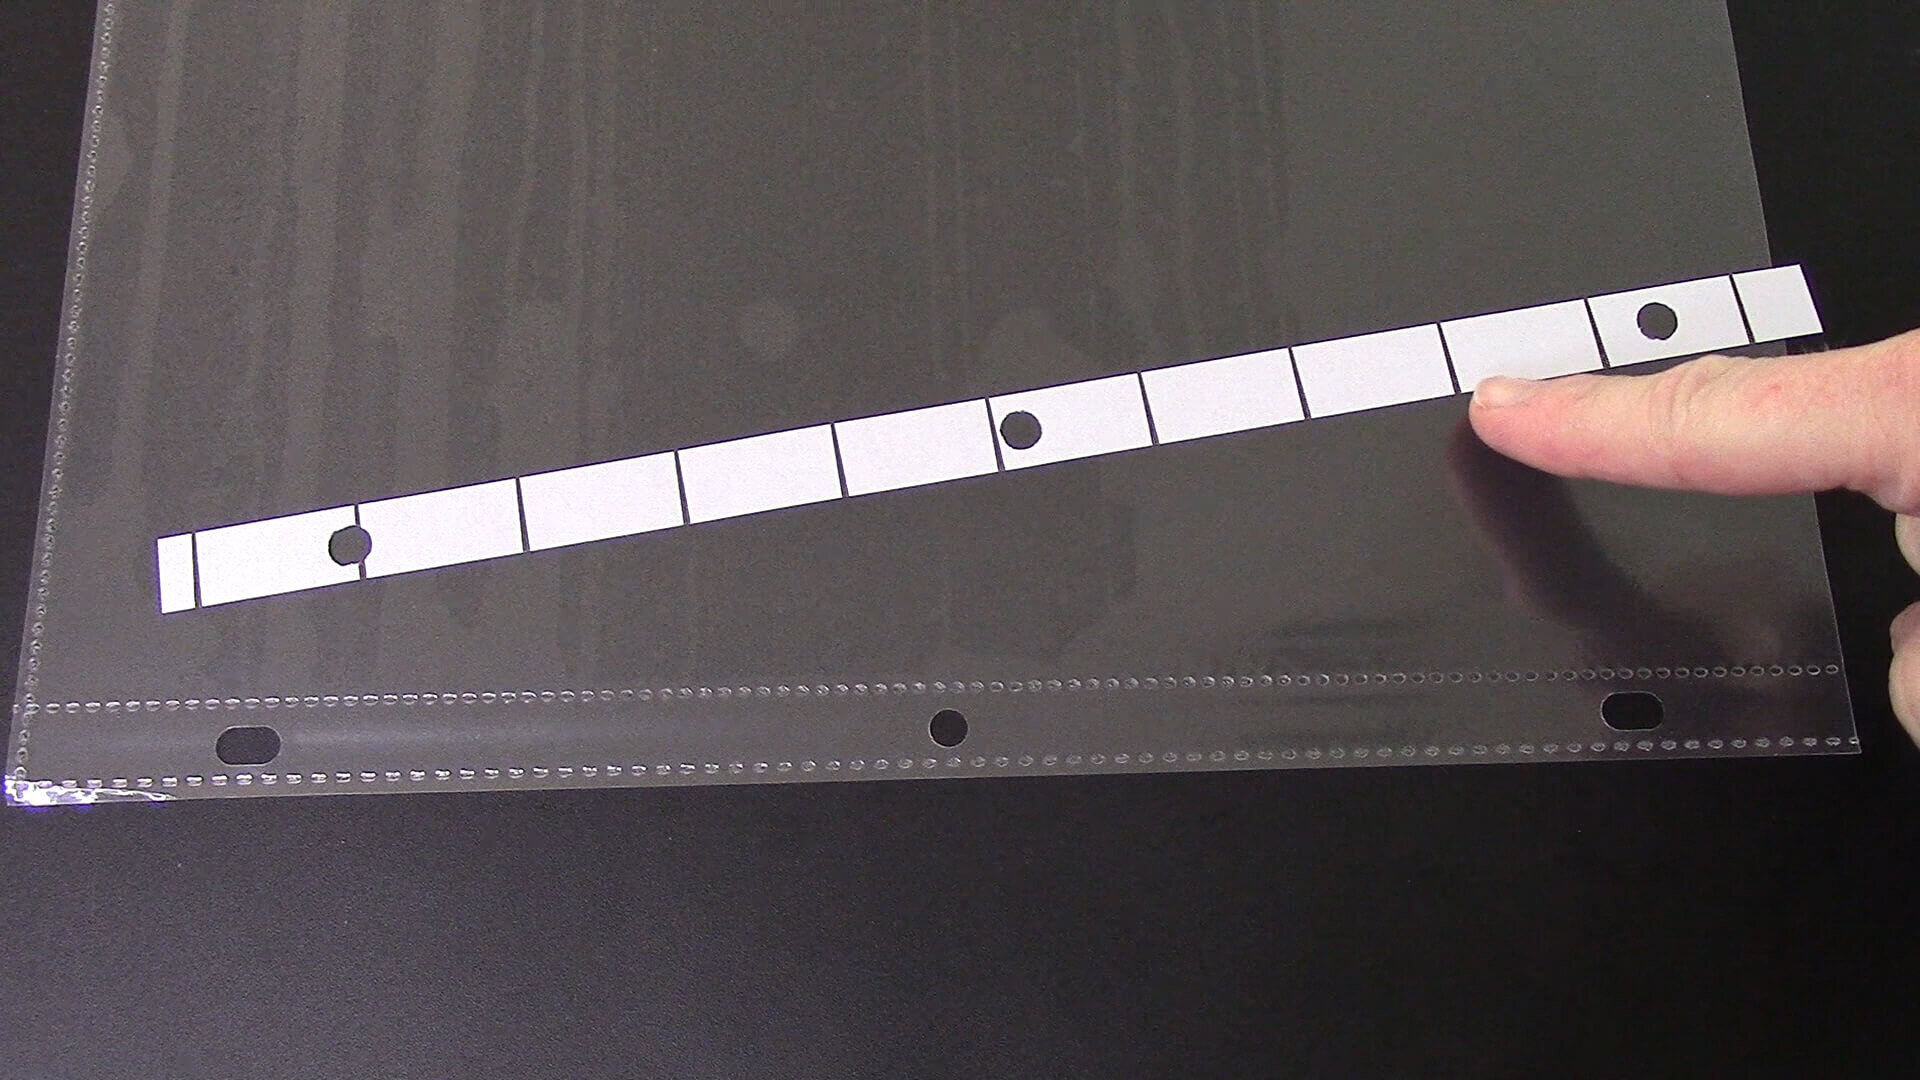
When sheet protector holes DO tear, these plastic hole-reinforcing strips are great for extending the life of your trifolds. These are the only hole reinforcements I've found that will stick to sheet protectors. 

Watch the video or read steps (shown below the video) for tips on how to apply them. (Sorry about the video quality 🤪.)

  1. Separate strips (if not already separated)

  2. Peel off paper backing to reveal sticky side of plastic; discard paper. Important: Use entire plastic strip and reinforce all three holes at once.

  3. If holes are not centered on the width of the strip, apply such that the wider part of plastic is toward the outside of the sheet protector (see video above for more explanation).

  4. Hold plastic strip slightly above the sheet protector to visually center the strip's middle hole with the sheet protector's middle hole.

  5. Align the other two holes and lightly place plastic strip on sheet protector. Note: If misaligned, lift up plastic strip and try again.

  6. Gently smooth plastic down outwards from the center hole. Press firmly along the entire strip to ensure strong adhesion.

A few other thoughts. The ends of these strips can be cut if they're too long to fit on other sheet protectors. 

These can be applied on top of previous reinforcement strips. You can also put them on the opposite side from existing reinforcements.

Finally, I find it easier to apply these against a solid-colored background. My kitchen counters have a spotty pattern, which makes it hard for me to see and line up the holes. I use a thin, solid-colored, plastic cutting board to make it easier.

Bifold Fold Out Sheet Protectors (11x17)

When my husband and I came up with the trifold design (to solve MY problem of needing six pages displayed at once), I presumed that giving you the option of displaying the maximum number of pages would be great.

I knew that if you didn't need the full capacity of a trifold, you could fold a pocket back or just leave it empty.

However, some of you said that you didn't always need to display six pages and that bifolds would be nice. Hint, hint, hint.

These bifolds have a seam between the pockets. (Most fold out 11 x 17 sheet protectors available at office supply stores don’t have a seam between the pockets.)

11x17-bifold-fold-out-sheet-protectors.png

These can be used in any standard 3-ring binder or with a ChoreoKeeper binder. (We place the clips such that they’ll hold up bifolds too.)

My experiments with these have shown card stock to be unnecessary. The holes ARE reinforced though.

I hope that these will make your ChoreoKeeper binder/sheet protectors even more useful to you.

Recommended Piano Light

No matter how well you've got your music set up, if it's too dark to read, it's going to be hard to feel relaxed about playing.

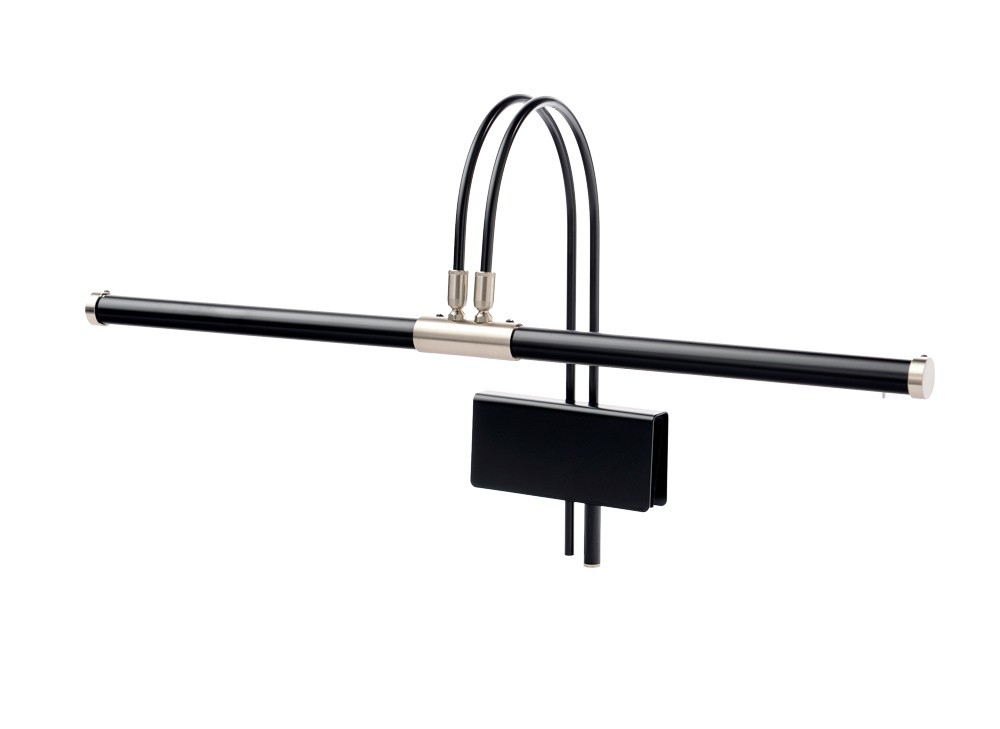
My mom RAVES about this Cocoweb light! She is a pianist who rotates playing among four churches and works with many different lighting conditions. 

The LED lights should last a looong time. My mom uses the plug-in light which gives her the freedom to NOT worry about batteries. However, it does mean that the piano needs to be near an outlet. 

Mother scoots her ChoreoKeeper back and forth as needed to bring outer pages within viewing range AND for good lighting.

Her 19" wide light illuminates several pages; there's also a 22" wide version (some reviews indicate that it will brighten 5-6 pages). The lights come in various finishes too.

This light is an investment, but you'll be set once you own one!

Cocoweb 22inch.jpg